Ventum One Owners Manual

OWNERS MANUAL

WELCOME TO VENTUM

Congratulations on your purchase of the Ventum One Bike!

Ventum stands behind the quality and engineering of our bikes and all of our products. Each item is meticulously developed in-house by our team of passionate riders. Our goal is to elevate your experience to be able to withstand all normal rugged wear and tear that comes with competing in a triathlon, running a crit series or enjoying a long gravel road to nowhere.

If you are not satisfied with your order, contact our customer support team about our 30-day return policy or let us know how we can make Ventum better.

ASSEMBLY FAQ'S

Most Frequently Asked Questions

&nbsp
&nbsp
&nbsp
&nbsp

Warranty & Returns

&nbsp

We offer a lifetime warranty for the frame to the original owner which covers against defects in materials and workmanship. All bike purchases need to be registered within 30 days of receipt of purchase to activate the warranty plan. All components are covered by Ventum within 30 days of receipt of the bike. After 30 days, components are covered by the manufacturer’s own warranties. Ventum branded handlebars, paint and decals, stems, seat-posts, forks, and fairings are covered for one year from the date of purchase. Ventum will not incur shipping or labor costs associated with warranty replacement.

&nbsp

Can Be found Here: Custom Fit

&nbsp

Can Be found Here: Shipping & Returns

&nbsp

Can Be found Here: Shipping & Returns

bike

Ventum One Owners Manual

UNBOXING & ASSEMBLY

LETS GET YOU SETUP AND IN THE SADDLE

What's Covered Here

  • Frame Diagram
  • Unboxing
  • Wheel Removal
  • Seat Post Installation
  • Frame Unboxing
  • Wheel Installation
  • Final Checks and Road Test

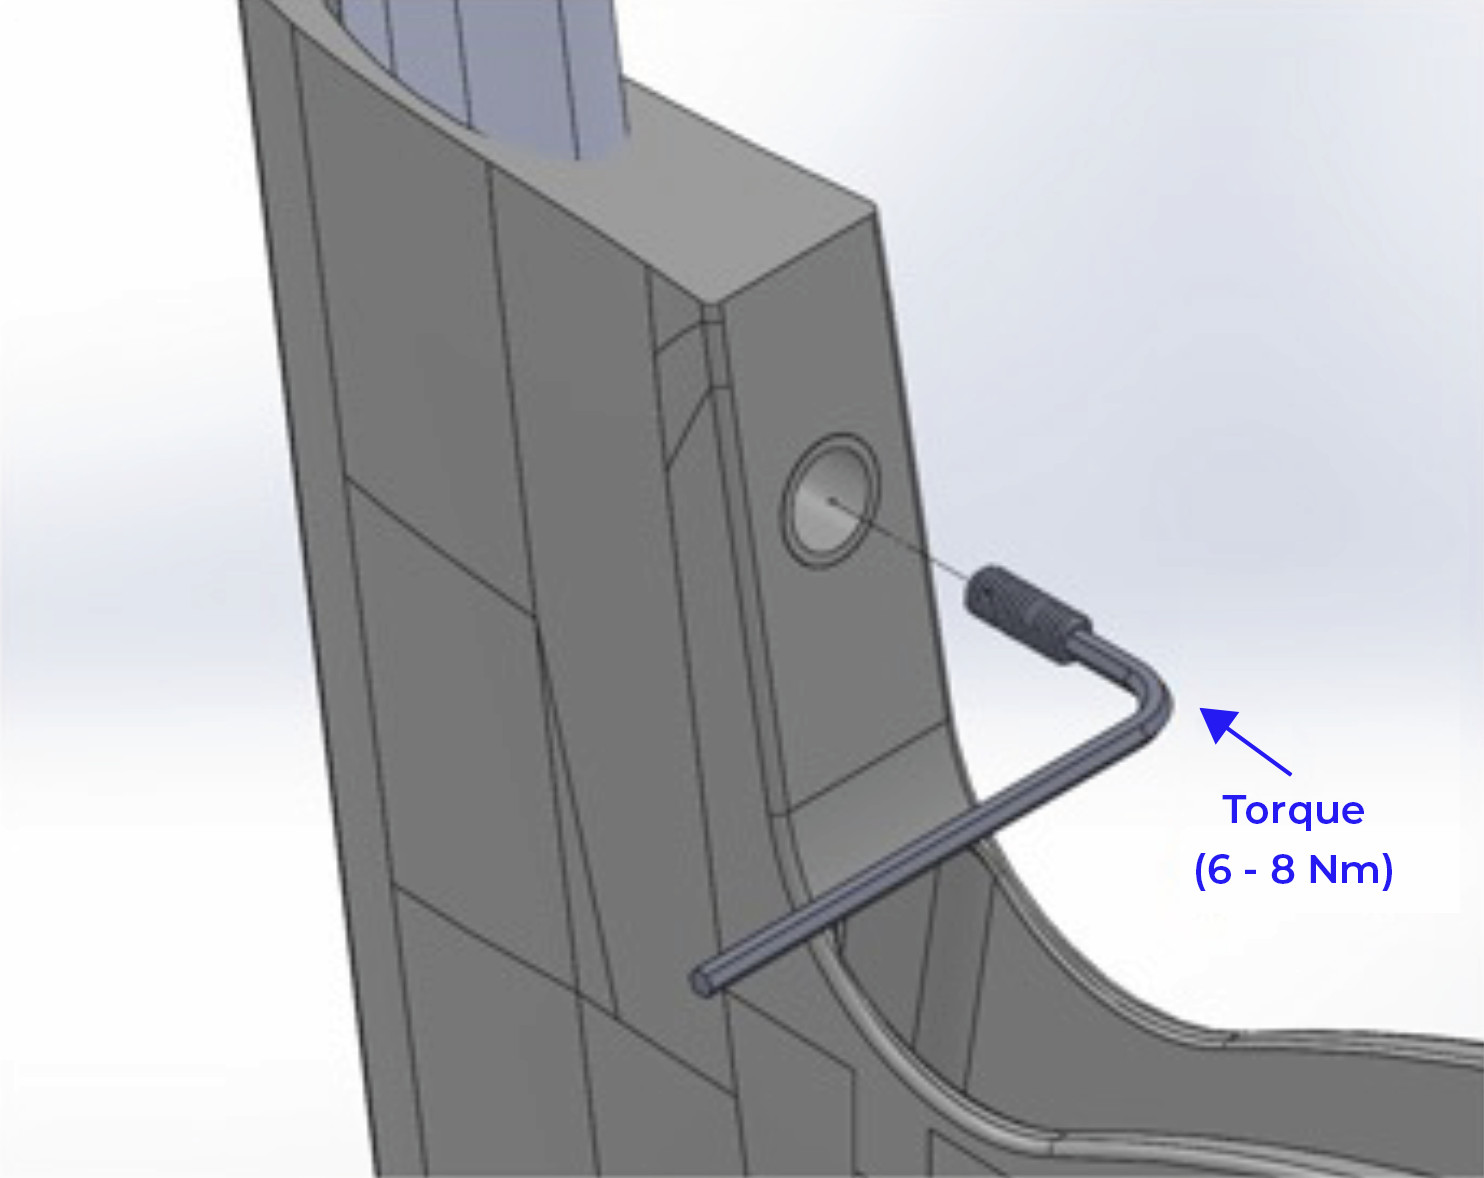
SEATPOST CLAMP

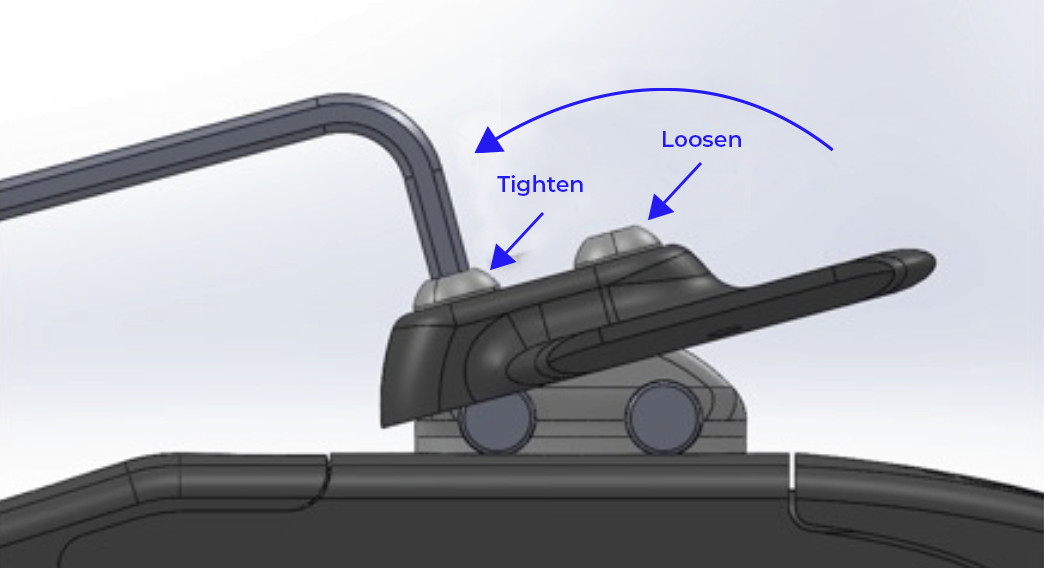
1. Insert the seat post into the frame. Ensure the minimum insertion depth of 10 cm is achieved.

2. Torque the seat post clamp bolt to a minimum of 6 Nm Temperature, moisture, and contaminants can affect the seat post clamp. If necessary, it can be torqued up to 8 Nm.

3. To remove or adjust the seat post, loosen the seat post clamp bolt. It is not necessary to remove it from the clamp entirely. Simultaneously tap the tail and nose of the saddle with your hands to disengage the clamp’s grip on the seat post and permit adjustment. Push or pull the seat post as required to achieve the desired saddle height.

NOSE-CONE SIDE BOLTS

1. Position the nose cone as shown

2. Hand tighten the nose cone side bolts

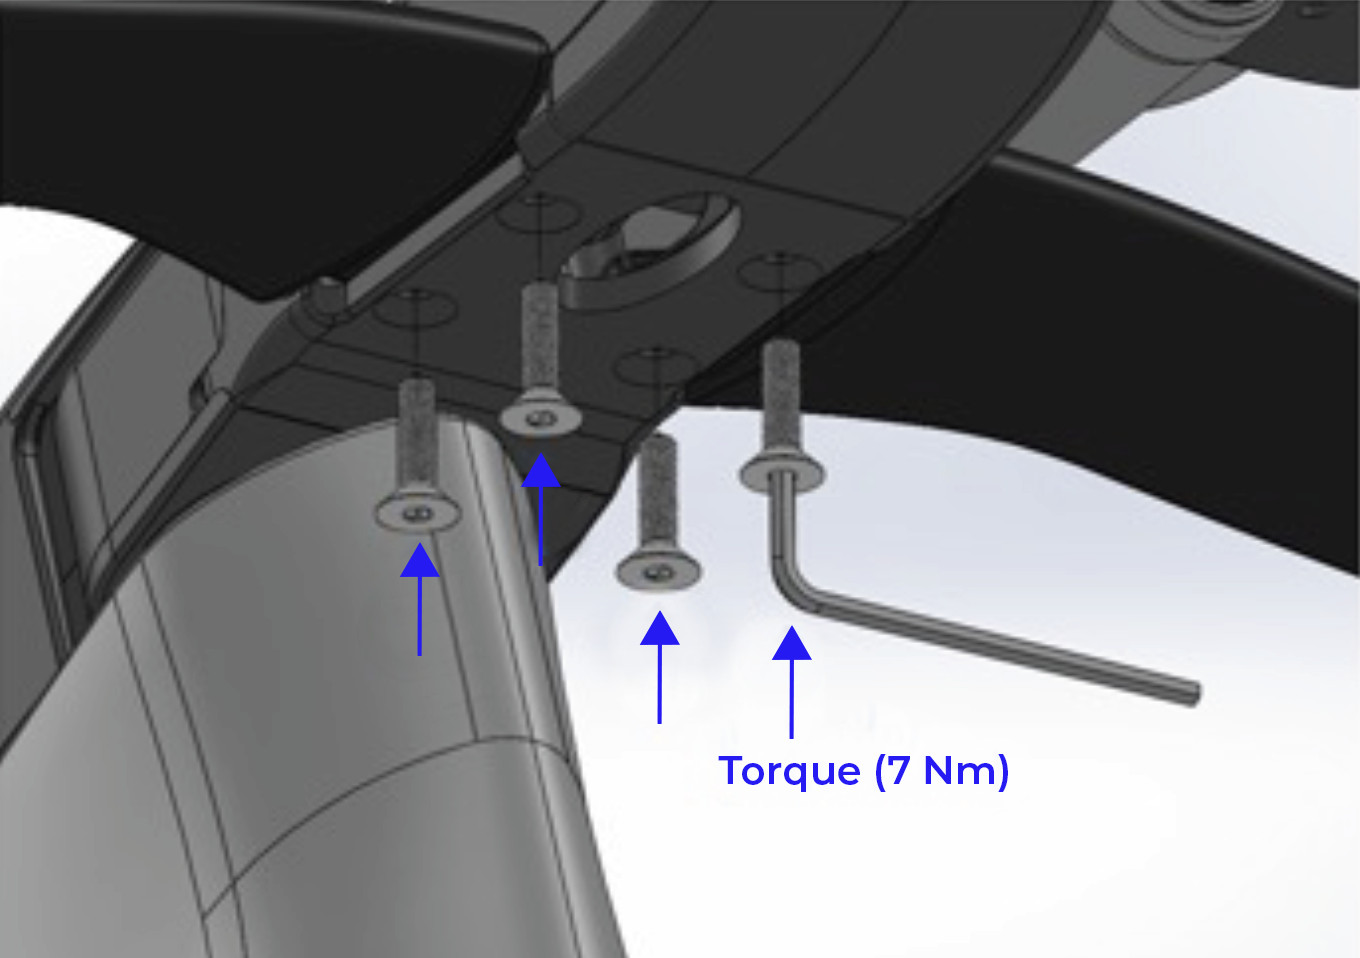
MONO-RISER BOLTS

1. Position the mast clamp as shown

2. Torque the mono-riser bolts to 7 Nm

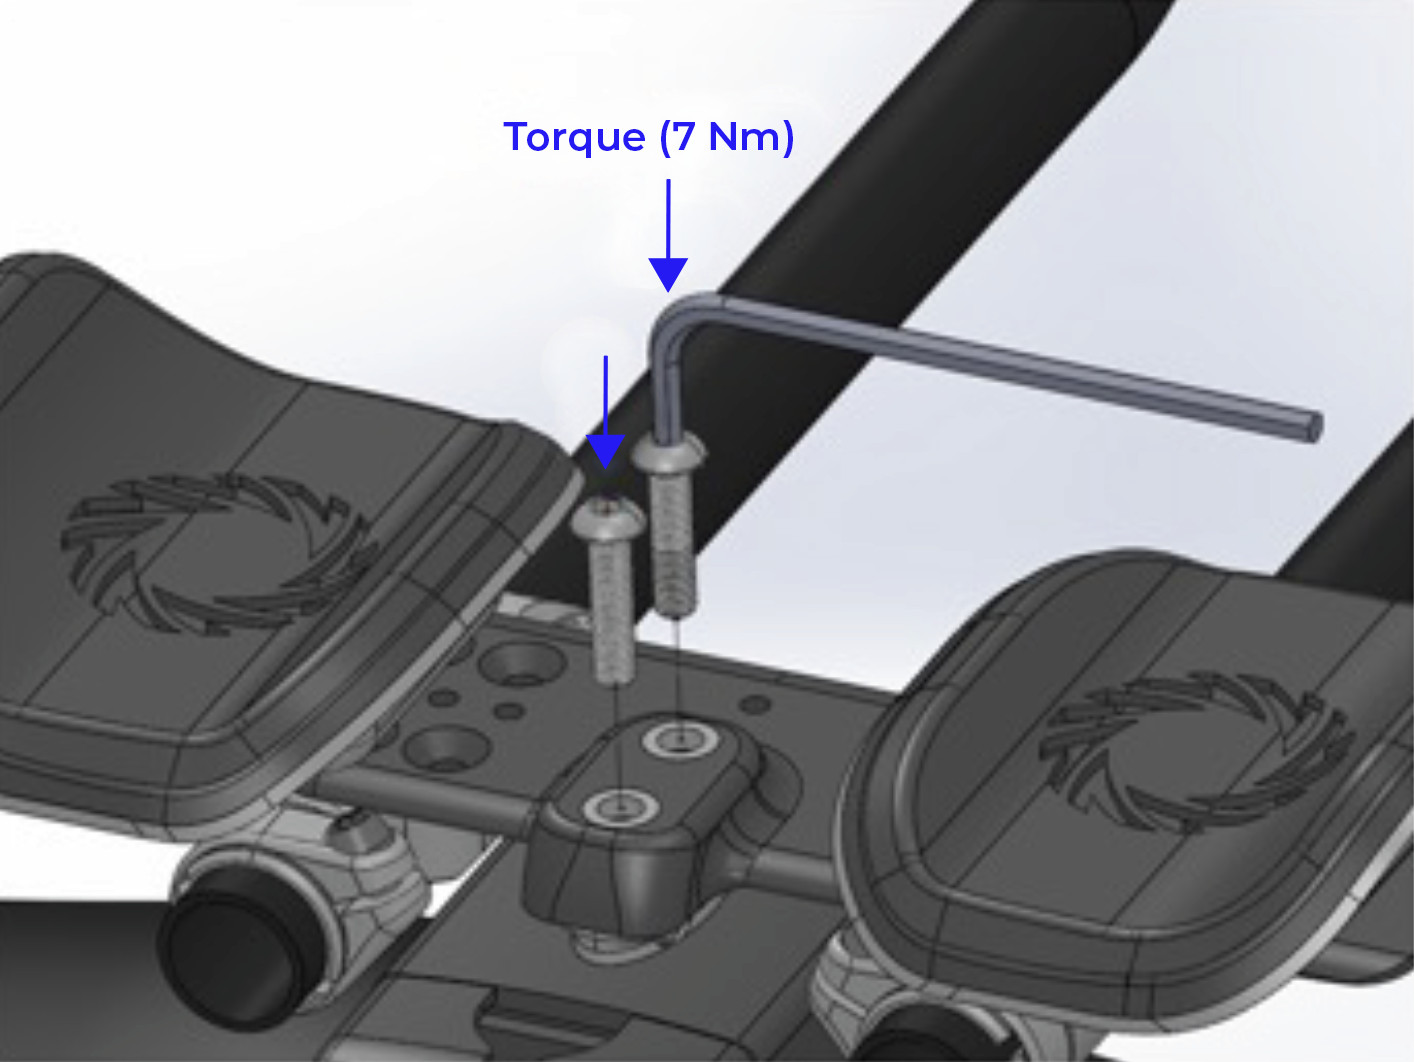
MAST TILT BOLTS

1. Position the armrest mount as shown

2. Torque the mast tilt bolts to 7 Nm

BASE BAR BOLTS

Torque the base bar bolts to 7 Nm

AERO EXTENSION HOLDER BOLTS

Torque the aero extension holder bolts to 5 Nm

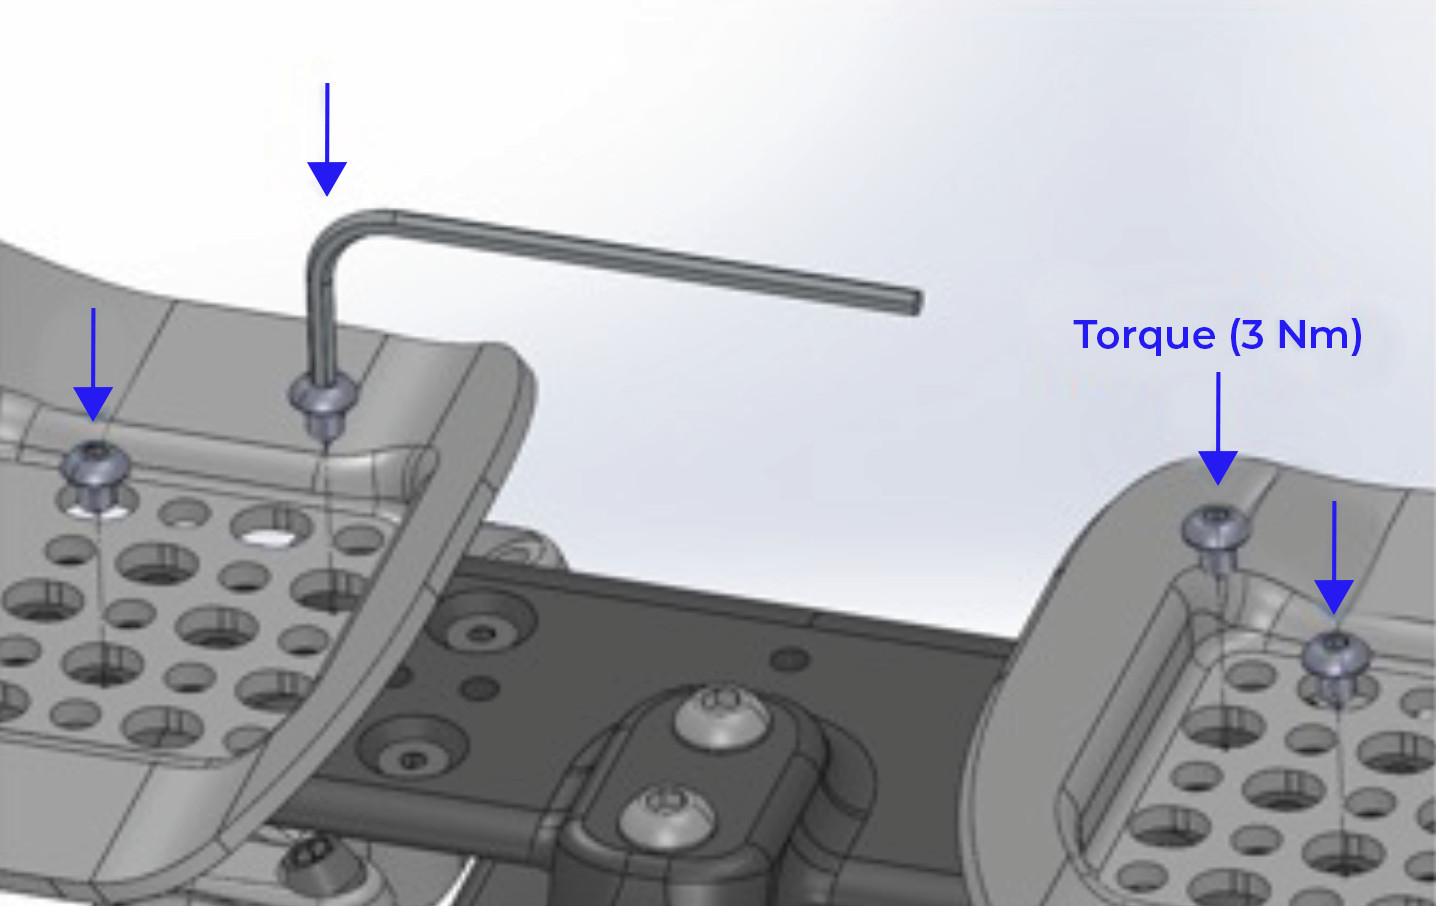
ARM CUP/PAD BOLTS

Torque the arm cup bolts to 3 Nm

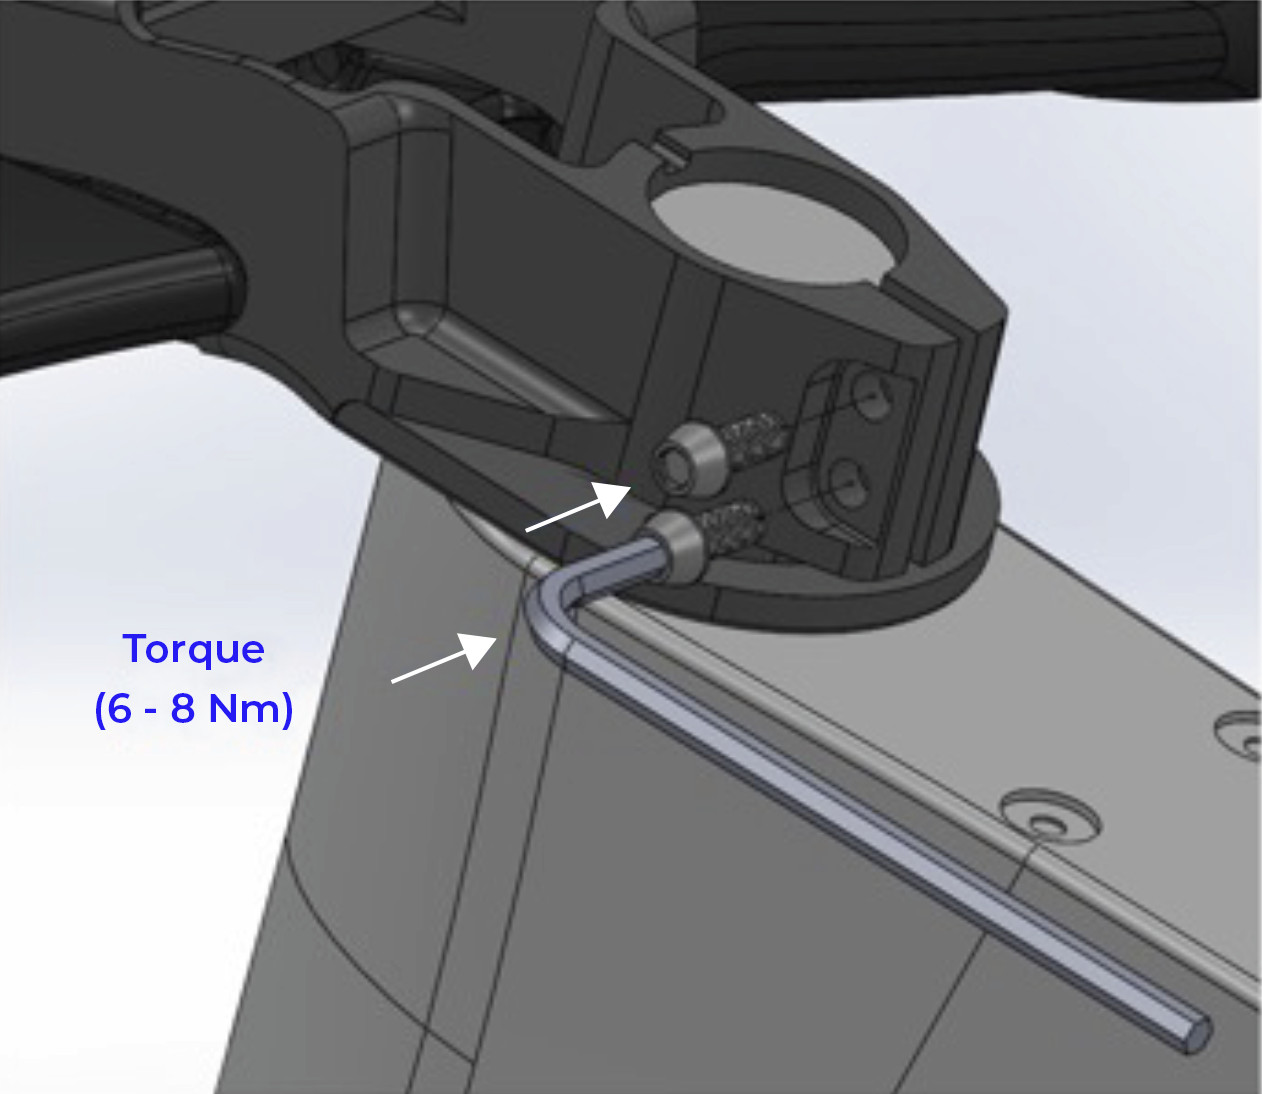
STEM BOLTS

Torque the stem bolts to 6 N.m.. If necessary, they can be torqued up to 8 Nm

TRP BRAKE LEVER BOLTS

Torque the brake lever bolts to 3 Nm

NOSE-CONE SIDE BOLTS

1. Fully loosen the right screw

2. Adjust the left screw until the mast is at the desired angle

3. Torque the right screw to 7 Nm

MAST HEIGHT

1. Loosen the mono-riser bolts until the riser post can slide freely

2. Adjust the mast until it is at the desired height

3. Torque the mono-riser bolts to 7 Nm

BOTTLE BRACKET

1. Place 1mm thick washers under the bottle bracket as shown

2. Torque the bottle bracket screws to 1 or 2 Nm

FRONT & REAR THRU AXLE

Install the thru axles and torque to 10 Nm

FRONT END ASSEMBLY

 
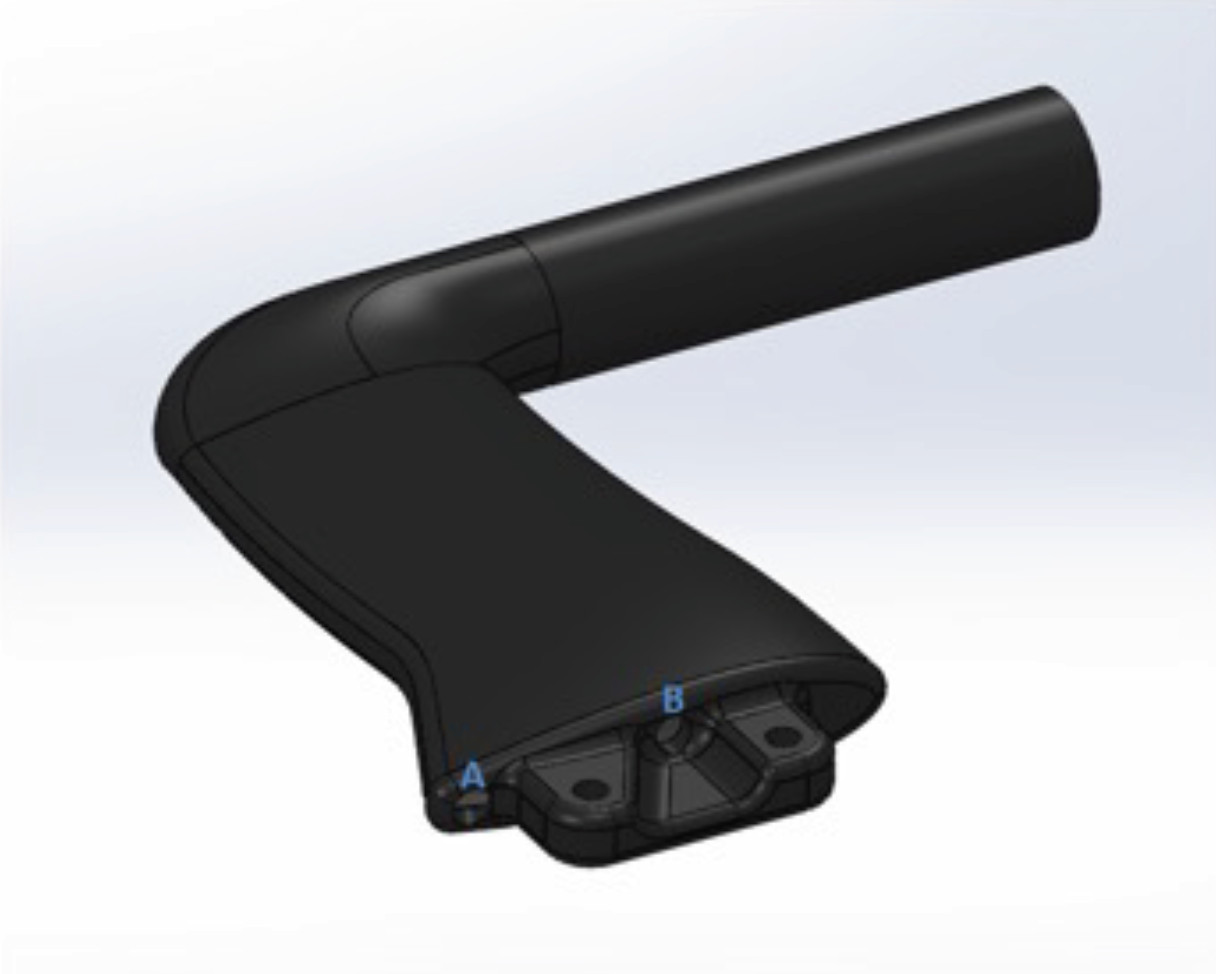
A: It is recommended to route the brake hoses through these ports
B: It is recommended to route the Di2/Etap cables through these ports
 
A: Right Etap/Di2 cable
B: Left Etap/Di2 cable
C: Front brake cable
D: Rear brake cable
 
A: Top of stem
B: Mast riser
C: Bottom of stem
D, E, F, G: Etap/Di2 cables

FRONT END ASSEMBLY

Remove the nose cone and mast.

Determine the length needed for the basebar. This is determined by which brake lever will be installed on the bike. When using TRP HD-T910 it is advisable to trim 3 CM off the ends of each side of the basebar.

If using brake levers with external bar clamps such as the HD-T910, be mindful to install the alloy reinforcement inserts prior to installation of brake lines. When using internally clamped brake levers such as SRAM S900 or Shimano D/A the alloy inserts are not needed.

Run the Etap or Di2 wires in the basebar wings. You can use either exit hole in the bar to run the wires through the stem.

Feed hydraulic brake lines into the basebar. It is important to run the Di2/Etap cables first as the hydraulic lines can make this very difficult.

Run the Di2/Etap cables two to each side within the stem on either side of the mast. This is a tight fit.

Di2/Etap wires run to the nose cone where the Blipbox/B-junction rests. These wires run UNDER the basebar nut plate.

Determining correct hydraulic hose length depends on what brake lever you install. The front end can be assembled by running the hoses through the frame and fork, then trimming the excess from the caliper. Remember to give yourself some slack for future transit.

When installing the mast, it is important to make sure you do not pinch any Etap/Di2 wires inside the stem. This can be done by using the index finger to guide the wires to either side of the mast while installing it into the stem.

Route cables from extensions into the stem and under the basebar nut plate within the stem out to the Blipbox/B-junction.

VENTUM BICYCLE WARRANTY

We offer a lifetime warranty on our frame, fork, and seatpost to the original owner which covers against defects in materials and workmanship. All bike purchases need to be registered within 30 days of receipt of purchase to activate the warranty plan. All components are covered by Ventum within 30 days of receipt of the bike. After 30 days, components are covered by the manufacturers' own warranties. All paints and decals are covered for one year from the date of purchase and does not include normal wear and tear.

What Isn't Covered

The Ventum warranty does not cover issues that arise from the following: incorrect assembly after receipt of delivery; incorrect or poor maintenance; accessories and parts that are installed on the bike but are not intended for use with the bike; accidents, neglect, misuse, or modification to the frame; normal wear and tear; modification to the frame or materials; UV damage, corrosion, or the use of incorrect cleaning products.

Crash Replacement

In the event of an accident we offer a crash replacement at a significantly reduced rate to get you back out and riding again. This replacement is for damage that occurs to the frame during riding and does not include cosmetic damage. This offer is valid for up to 5 years and is only available to the original owner, with proof of purchase.


Coverage period is based on the purchase date of the original product. The period does not start over when a product is replaced. If your product needs to be replaced and we no longer have it in stock, we’ll try our best to find you the most similar product available. Ventum will not incur shipping or labor costs associated with crash replacement. You will need to send the damaged product back to us before we send out the new product.