NS1 Owners Manual

OWNERS MANUAL

WELCOME TO VENTUM

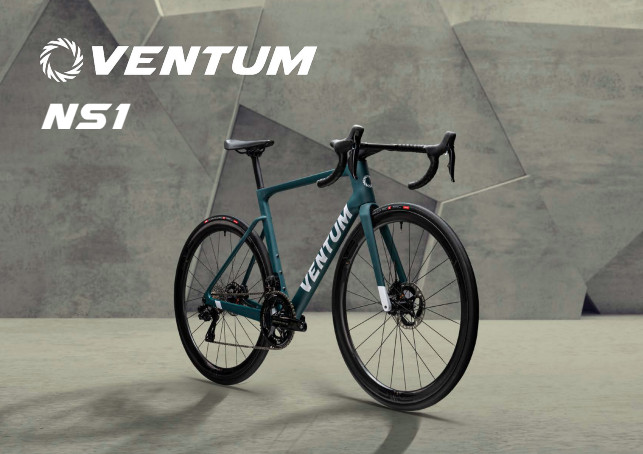
Congratulations on your purchase of the Ventum NS1,
your Aero All-Road Performance Bike!

Get ready to experience a bike that is totally unlike any other on the road today. Your new Ventum NS1 combines forward thinking design with the most advanced technologies available, to shatter the notion that a road bike can be either lightweight or aerodynamic.

This document will guide you through the process of setting up your new bike and getting out on the road.

If you are not satisfied with your order, contact our customer support team about our 30-day return policy or let us know how we can make Ventum better.

ASSEMBLY FAQ'S

Most Frequently Asked Questions

&nbsp
&nbsp
&nbsp
&nbsp
&nbsp

Warranty & Returns

&nbsp

We offer a lifetime warranty for the frame to the original owner which covers against defects in materials and workmanship. All bike purchases need to be registered within 30 days of receipt of purchase to activate the warranty plan. All components are covered by Ventum within 30 days of receipt of the bike. After 30 days, components are covered by the manufacturer’s own warranties. Ventum branded handlebars, paint and decals, stems, seat-posts, forks, and fairings are covered for one year from the date of purchase. Ventum will not incur shipping or labor costs associated with warranty replacement.

&nbsp

Can Be found Here: Custom Fit

&nbsp

Can Be found Here: Shipping & Returns

&nbsp

Can Be found Here: Shipping & Returns
 
bike

NS1 Owners Manual

UNBOXING & ASSEMBLY

LETS GET YOU SETUP IN THE SADDLE

What's Covered Here

  • Frame Diagram
  • Unboxing
  • Wheel Removal
  • Seat Post Installation
  • Frame Unboxing
  • Wheel Installation
  • Final Checks and Road Test

FRAME DIAGRAM

Please carefully inspect the diagram below. It gives you a thorough break down of the names of the tubes that the frame/fork consist of and the components that this bike uses.

Ventum Bike Part Diagram

UNBOXING

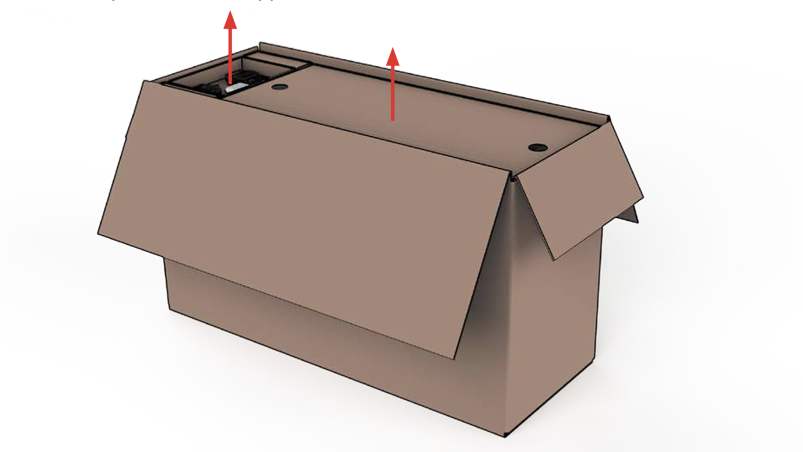
Remove the parts and support cover. Then remove the top tube foam blocks and shifter blocks.

Open Pack Instructions

WHEEL REMOVAL

Remove the straps and foam blocks from the wheels. Note bars may be turned for fit.

Next remove the wheels from the box and remove the hub guards.

SEAT POST INSTALLATION

First detach the seat post and remove the protective foam. Next undo the strap around the bottom bracket.

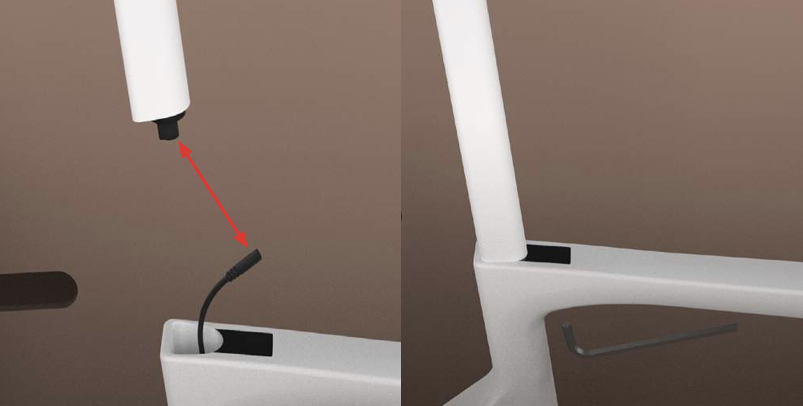
  1. Plug both Di2 cables into the seat post battery--you should hear them click into place. The battery has three ports. Be sure to plug one of the Di2 cables into the center port. Plug the 2nd Di2 cable into an empty port. *Step #1 only required for Shimano Ultegra or Dura Ace Di2 builds.
  2. Insert the seat post into the frame. Ensure the minimum dept of depth of 10 cm is achieved. Carbon paste is not necessary. If you choose to use carbon paste, only apply to the back and/or sides of the seatpost, making sure to avoid the front side and seat post clamp.
  3. Torque the 5mm BLACK seat post clamp bolt to a minimum of 6 N.m. using a torque wrench. Do NOT adjust the silver retaining bolt. Temperature, moisture, and contaminants can affect the seat post clamp. If necessary, it can be torqued up to 8 N.m. Do NOT attempt to remove the black 5mm bolt. Removing it may damage the frame

NOTE: To remove or adjust the seat post, loosen the seat post clamp bolt. It is not necessary to remove it from the clamp entirely. Simultaneously tap the tail and nose of the saddle with your hands to disengage the clamp’s grip on the seat post and permit adjustment. Push or pull the seat post as required to achieve the desired saddle height.

WARNING - Failure to follow these instructions could lead to serious injury or death.

SEAT POST CLAMP
TORQUE SPEC


Tighten to
6 N.m.


Do no over tighten this component!

FRAME UNBOXING

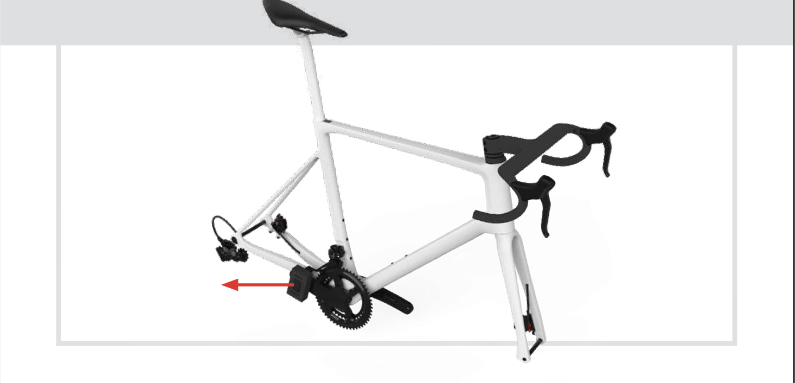
Remove the straps from the handlebar. Next lift the frame out of the box. Finally detach teh strap and foam block from the crank arm.

WHEEL INSTALLATION

Unscrew the thru axles from the frame and fork using a 6mm hex tool. Next remove the spacers from the brake calipers. Install the wheels ensuring the brake rotor lines up between the brake pads. Finally secure the wheels by re-intalling the thru axles. Torque to 10 N.m.

WARNING - Failure to follow these instructions could lead to serious injury or death.

FINAL CHECKS AND ROAD TEST


  1. Install your pedals as per the manufacturer’s instructions.
  2. Then Check the tire pressure and inflate as per the manufacturer’s recommendation.
  3. Adjust the saddle height as necessary. Ensure the seat post minimum insertion depth of 10 cm is achieved.
  4. Put on your shoes and helmet and take your new bike out for a road test. Always wear a helmet when you ride your bicycle.
  5. Check the operation of the brakes, derailleurs, and steering.
 

VENTUM BICYCLE WARRANTY

We offer a lifetime warranty on our frame, fork, and seatpost to the original owner which covers against defects in materials and workmanship. All bike purchases need to be registered within 30 days of receipt of purchase to activate the warranty plan. All components are covered by Ventum within 30 days of receipt of the bike. After 30 days, components are covered by the manufacturers' own warranties. All paints and decals are covered for one year from the date of purchase and does not include normal wear and tear.

What Isn't Covered

The Ventum warranty does not cover issues that arise from the following: incorrect assembly after receipt of delivery; incorrect or poor maintenance; accessories and parts that are installed on the bike but are not intended for use with the bike; accidents, neglect, misuse, or modification to the frame; normal wear and tear; modification to the frame or materials; UV damage, corrosion, or the use of incorrect cleaning products.

Crash Replacement

In the event of an accident we offer a crash replacement at a significantly reduced rate to get you back out and riding again. This replacement is for damage that occurs to the frame during riding and does not include cosmetic damage. This offer is valid for up to 5 years and is only available to the original owner, with proof of purchase.


Coverage period is based on the purchase date of the original product. The period does not start over when a product is replaced. If your product needs to be replaced and we no longer have it in stock, we’ll try our best to find you the most similar product available. Ventum will not incur shipping or labor costs associated with crash replacement. You will need to send the damaged product back to us before we send out the new product.